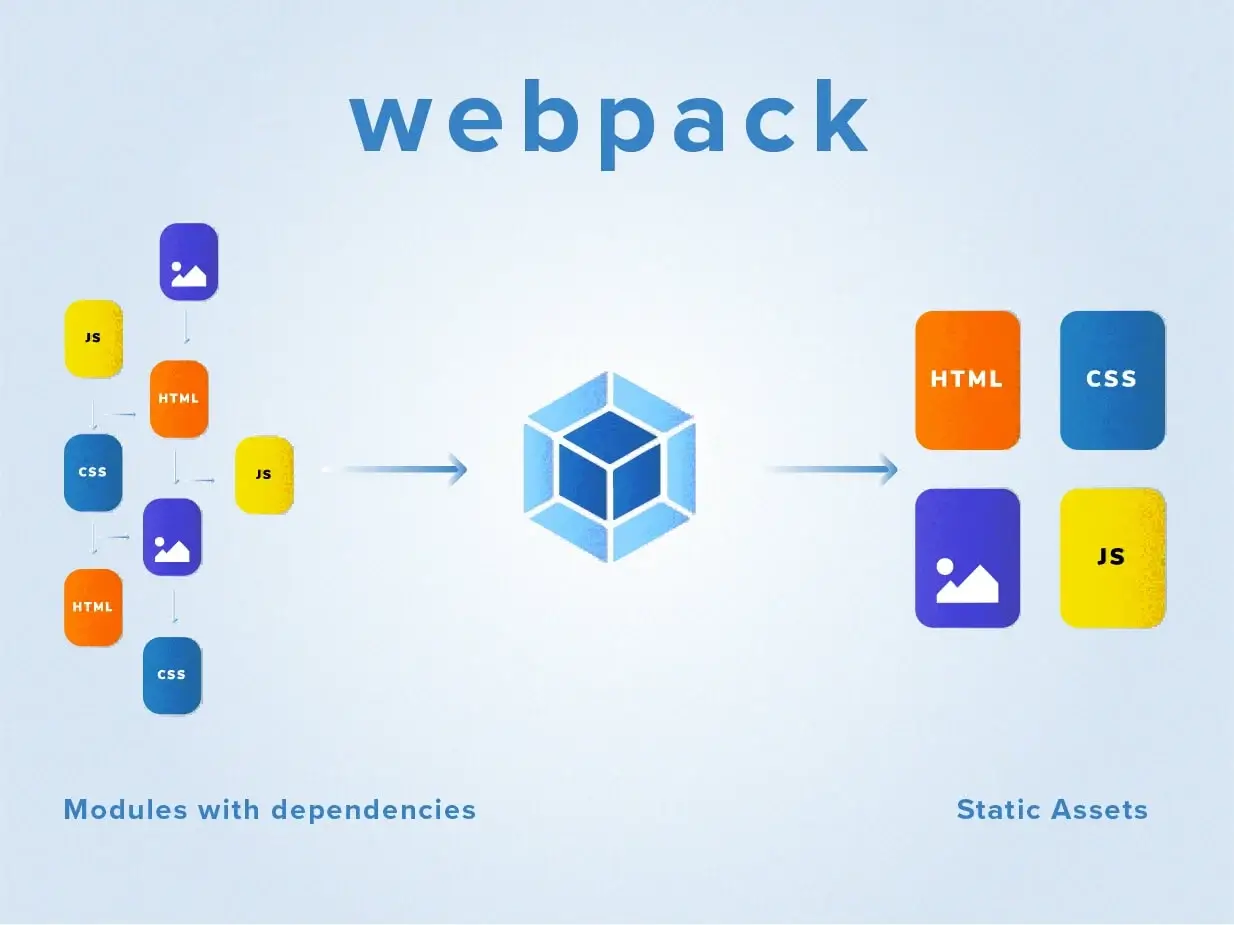
Among various module bundlers, webpack turns out to be the most popular and powerful one due to its many features like improved performance and load time, to name a few! If you’re not familiar with it, I hope this blog will get you started with this powerful tool.
So, What exactly is a webpack?
A webpack is a powerful module bundler for JavaScript applications that packages all the modules in your application into one or more bundles (often, just one) and serves it to the browser. However, Webpack is more than just a module bundler. With the help of loaders and plugins, it can optimize, transform and minify all types of files before serving them as one bundle to the browser.
It takes in various assets, such as JavaScript, HTML, CSS, Fonts, and Images and then transforms these assets into a format that’s convenient to consume through a browser. And I think this is fair enough to go ahead with webpack.
Understanding core concepts:
There are 4 key concepts in webpack that will cover an overall view of webpack and it’s configuration. Let’s get started.
1.Entry Point:
An entry point indicates which module, the webpack should use to begin building out its internal dependency graph. webpack will figure out the entry point’s dependencies. By default, its value is ./src/index.js, but you can specify a different (or multiple entry points) by configuring the entry property in the webpack configuration.
Include the following in the webpack.config.js file
module.exports = {
  entry: './path/to/my/entry/file.js'
};
-
Output:
Output defines where to emit the bundled files and assets. The following snippet tells out how the output can be configured in webpack.config file.
const path = require('path');
module.exports = {
   entry: './path/to/my/entry/file.js',
   output: {
     path: path.resolve(__dirname, 'dist'),
     filename: 'my-first-webpack.bundle.js'
  }
};
-
Loaders:
webpack understands only JS and JSON files, so in order to allow webpack to identify other file types, Loaders came into the picture. It defines the webpack to transform other types. It has two main properties, test, a regex pattern for testing the type of files and use for using the specific loaders for that type.
const path = require('path');
module.exports = {
   output: {
     filename: 'my-first-webpack.bundle.js'
},
module: {
    rules: [{
            test: /\.txt$/,
            use: 'raw-loader'
    }]
};
-
Plugins:
While loaders are used to transform various modules, plugins can be used to perform a wider range of tasks like bundle optimization, asset management and injection of environment variables. Plugins are customizable through options. We need to require() a plugin and need to create an instance of that using the new operator.
const HtmlWebpackPlugin = require('html-webpack-plugin');
const webpack = require('webpack');
module.exports = {
  module: {
    rules: [
      { test: /\.txt$/, use: 'raw-loader' }
  },
  plugins: [
    new HtmlWebpackPlugin({template: './src/index.html'})
};
How webpack works?
Webpack seems to be a mystery in the JavaScript world. So let’s go ahead and get some working examples to understand how it works. But before that, let’s make some basic setup to proceed with.
npm i -D webpack webpack-cli
Also, add build scripts to package.json
-
Bundling JS
Create an src folder because webpack always looks for a source folder and index.js file before bundling JS. Now, if you run the npm run build, a dist folder will be created along with a main.js file that bundles your source file.
-
Bundling HTML
Create an index.html file under the source folder and add the created index.js file into the script tag. Now, if you run build, you’ll get a syntax error. By now, you should have probably known the reason behind it. Yes! webpack doesn’t recognize any other type except JS. So let’s configure webpack for fixing this.
Create a webpack.config.js file and pre-install a loader to allow webpack to transform HTML files.
npm i -D html-webpack-plugin html-loader
Then configure the installed loader into the webpack config file and after that, now webpack will be able to bundle the HTML files as well.
-
Bundling Image
Webpack neither bundles images so that we need to install a loader to allow webpack to do that.
npm i -D file-loader
Then configure the loader in webpack and create an image folder and put an image inside that. Also, include the image in img tag inside the index.html file and run npm run build. Now webpack bundles your images as well.
-
Bundling Scss
I hope now there is no need to say that again. So let’s get straight towards installing loaders for bundling styles and see it bundled after configuring that in webpack.
npm i -D node-sass style-loader css-loader sass-loader mini-css-extract-plugin
webpack.config.js
Let’s have a look into the final code structure of webpack.config.js after all the above configurations.
const HtmlWebpackPlugin = require("html-webpack-plugin");
const MiniCssExtractPlugin = require("mini-css-extract-plugin");
module.exports = {
   module: {
       rules: [{
               test: /\.html$/,
               use: [{
                   loader: "html-loader",
               }]
           },
               test: /\.(png|svg|jpg|gif)$/,
               use: [
                   'file-loader'
           },
               test: /\.scss$/,
               use: [
                   'style-loader', 'css-loader', 'sass-loader'
           },
   },
   plugins: [
       new HtmlWebpackPlugin({
           template: "./src/index.html",
           filename: "./index.html"
       }),
       new MiniCssExtractPlugin({
           filename: "[name].css",
           chunkFilename: "[id].css"
       })
}
References
- https://webpack.js.org/
- https://www.youtube.com/watch?v=TzdEpgONurw


